Importing and Compressing (Saving) Video Files
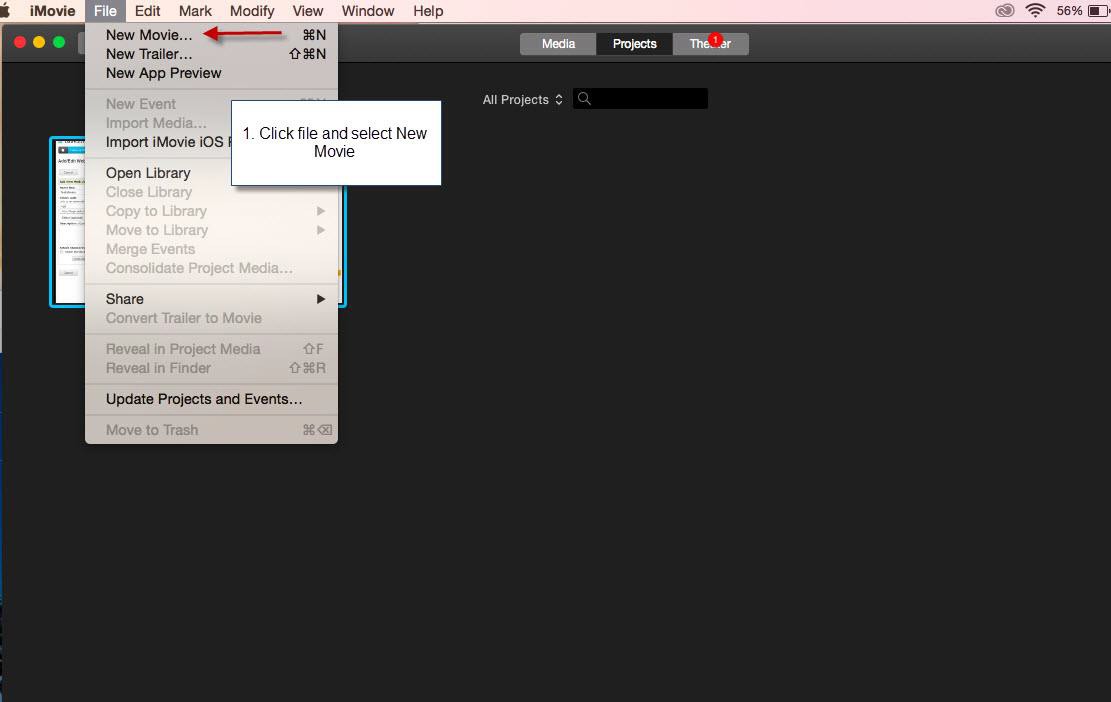
1. Click File, and then select New Movie (or click on the “New Movie” icon).
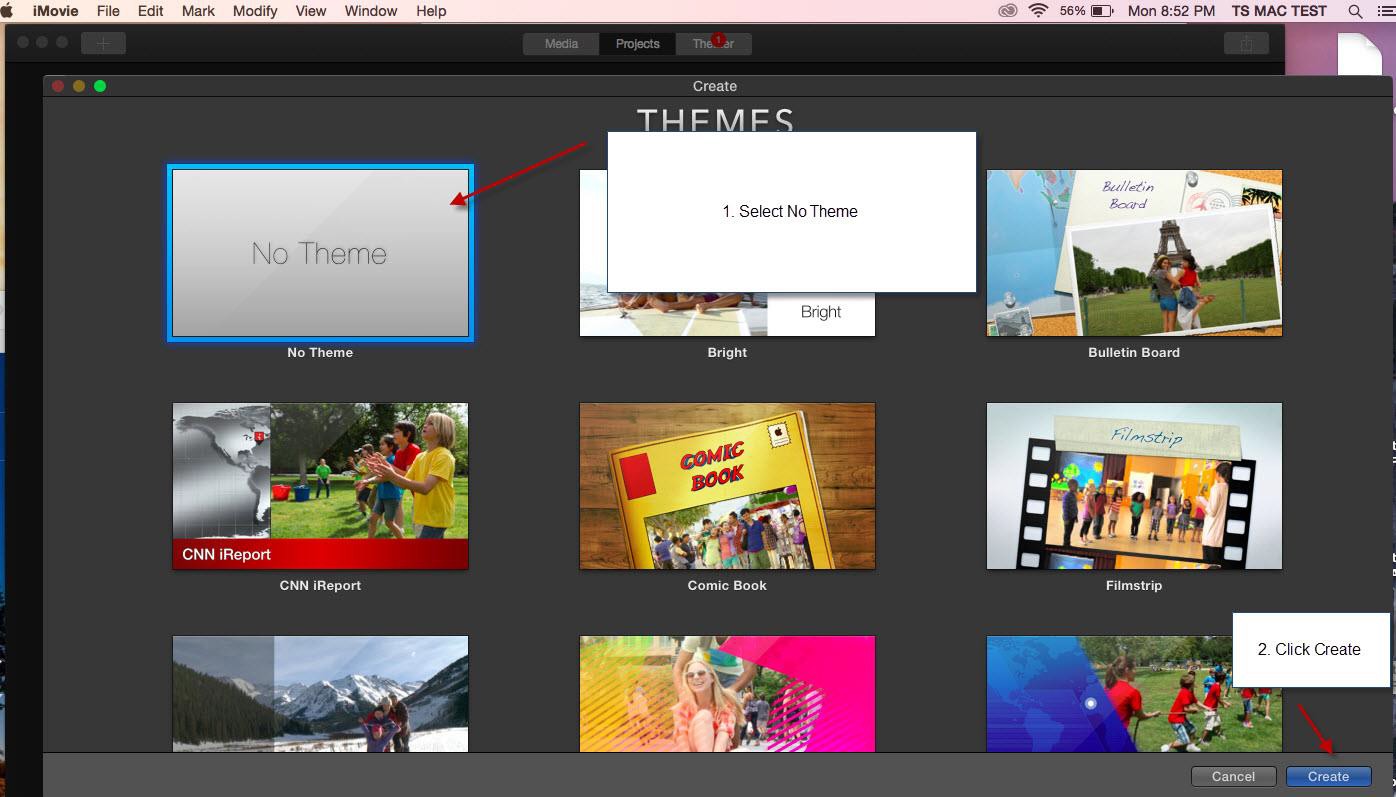
2. Select No Theme, and then click Create.
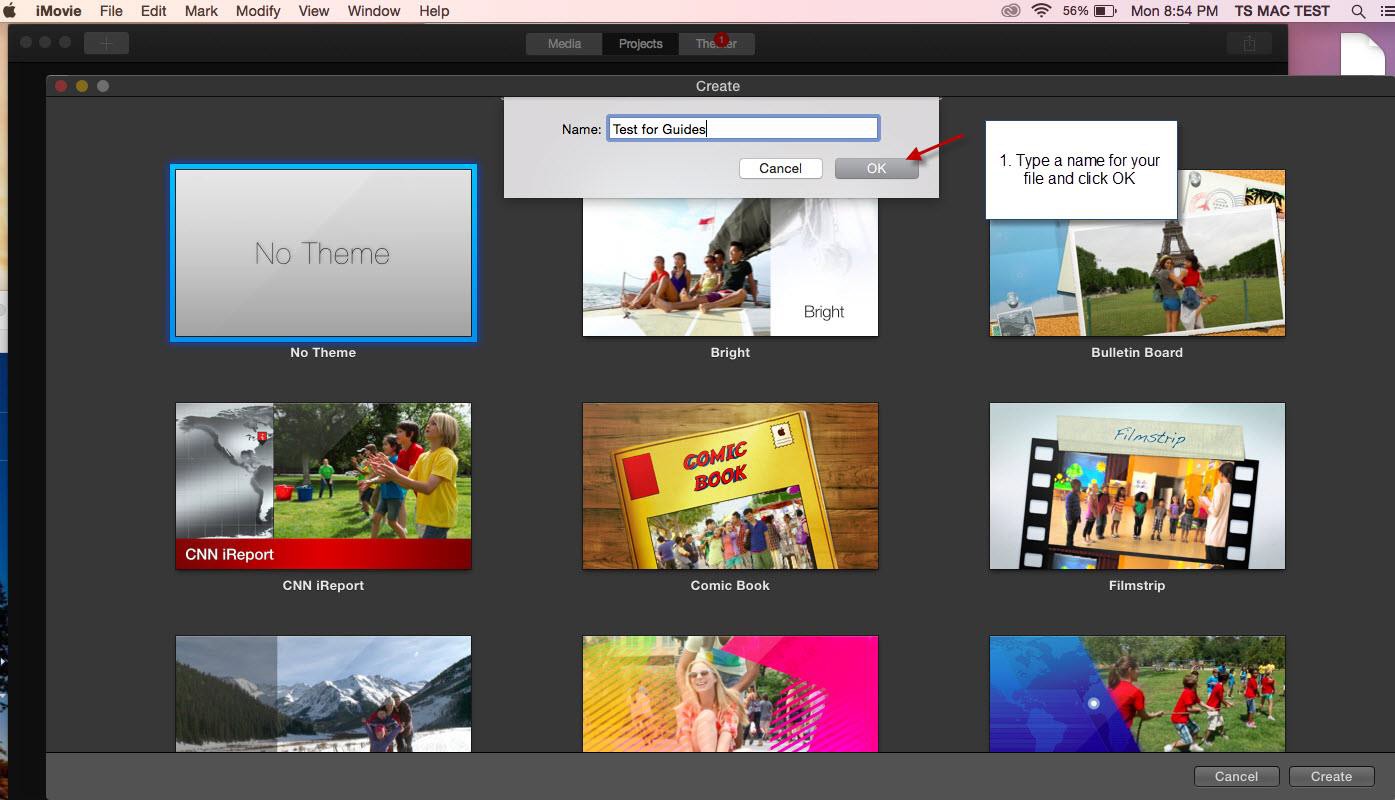
3. Type a name for your file (Project), use the word “project” in the name (ie, John Smith project) and click OK.
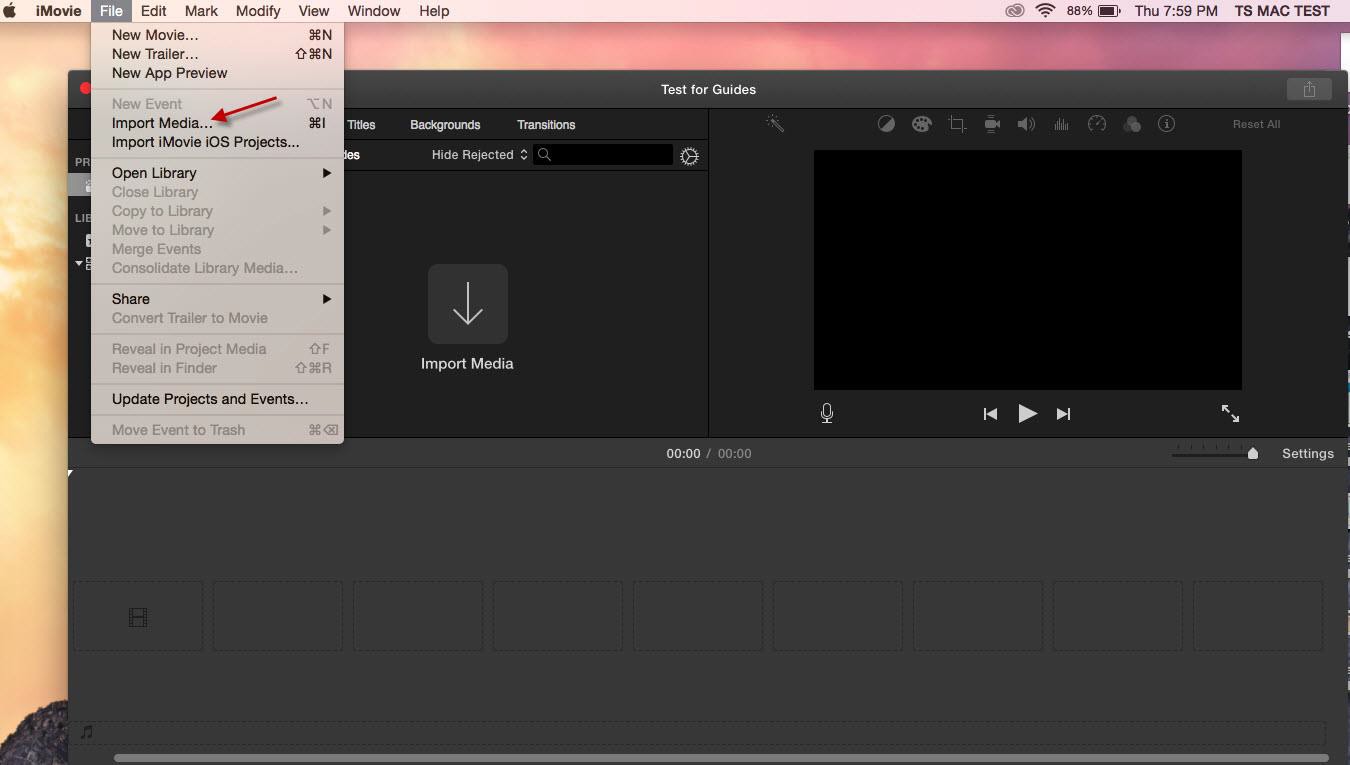
4. Click File, and then select Import Media (or click on the “Import Media” down arrow icon).
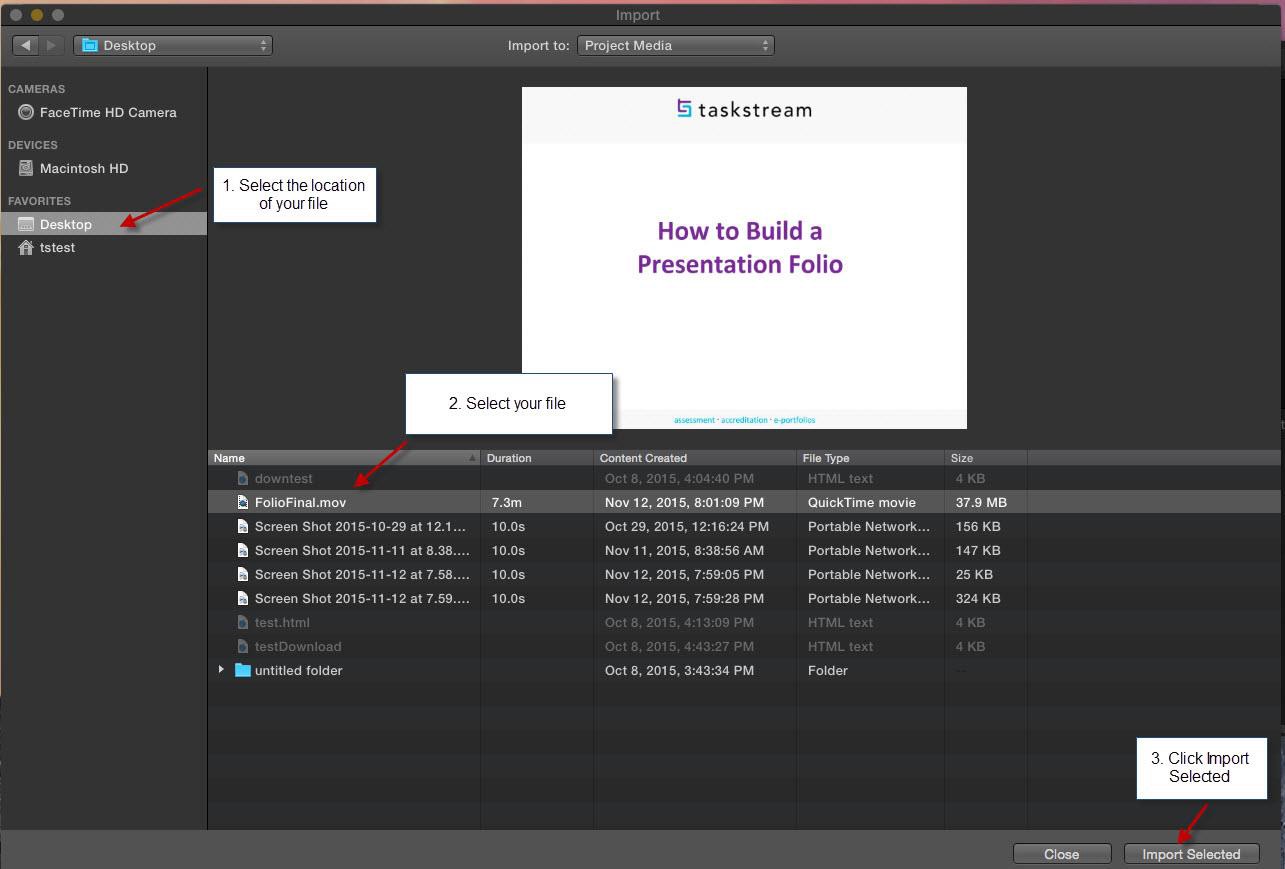
5. On the left panel, select the location of your file from the computer (it can be from a USB flash drive or a MicroSD card adapter). Select the name of your file at the bottom panel, and click Import Selected.
6. Once imported, the video (with periodic thumbnails) will appear on the upper left panel of the screen. DO NOT delete this video. It is the original video and should reside permanently on the upper left hand portion of the screen. You may import multiple videos by repeating steps 4-‐5.
7. Select the desired segment of the video in the upper left panel of the screen by highlighting the segment, or by pressing Command + A (to select all). Highlighted segment will be in yellow. Then, drag and drop to the bottom panel (timeline). The running time will show on top of the timeline.
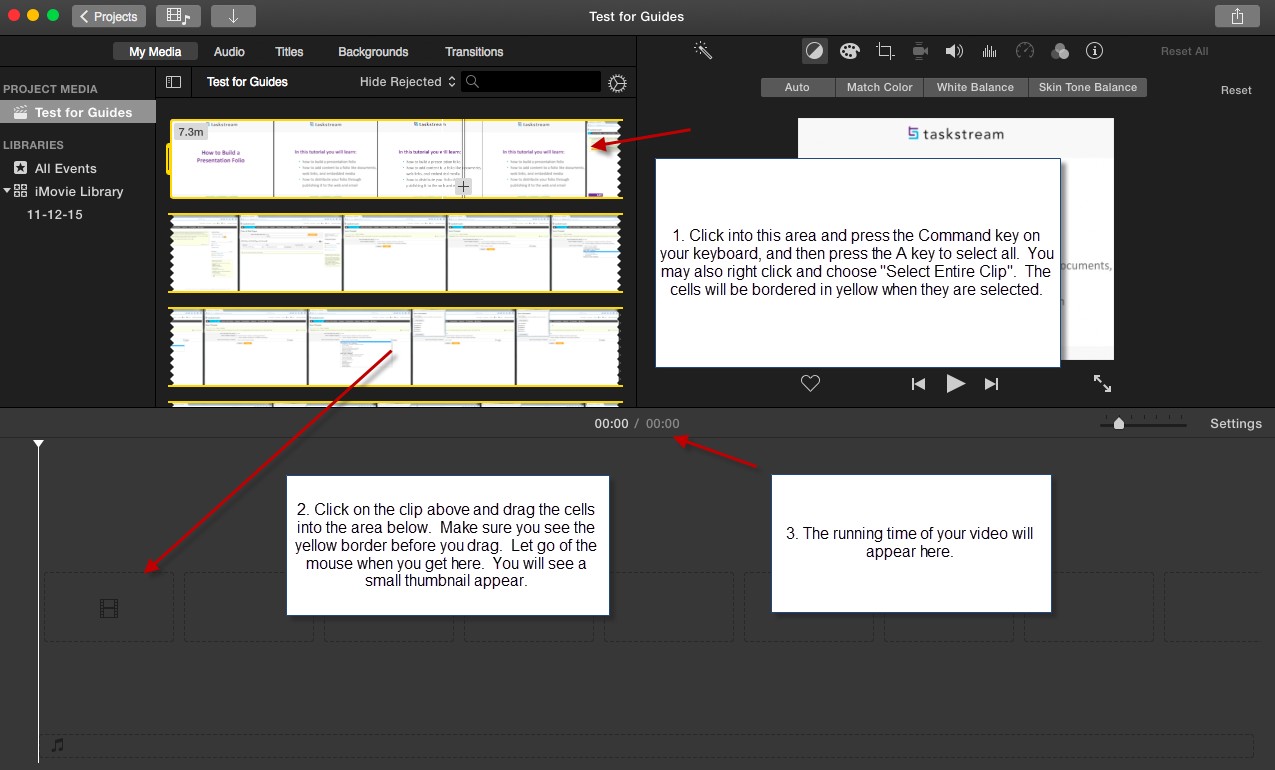
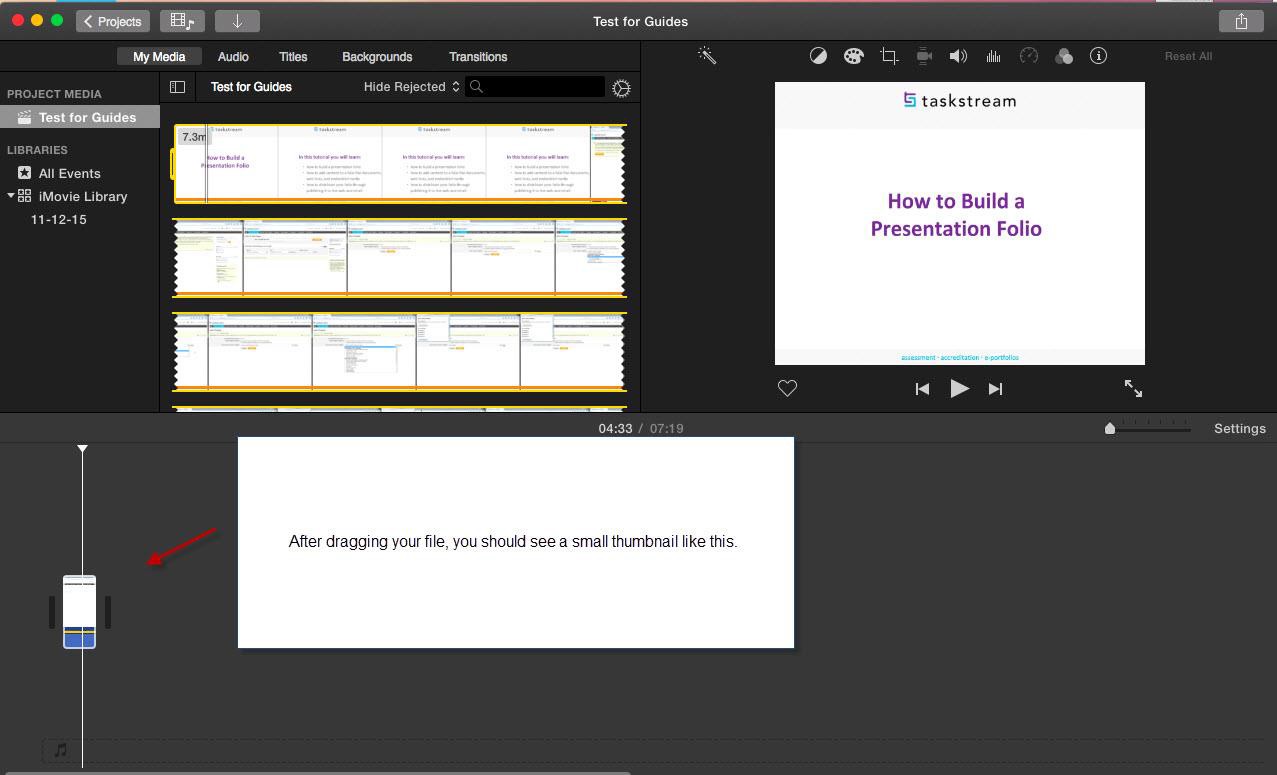
8. After dragging, you will see a small thumbnail or timeline view of your video. The thumbnail or timeline view contains the entire video, which may be edited. Repeat step 7 to insert multiple segments.
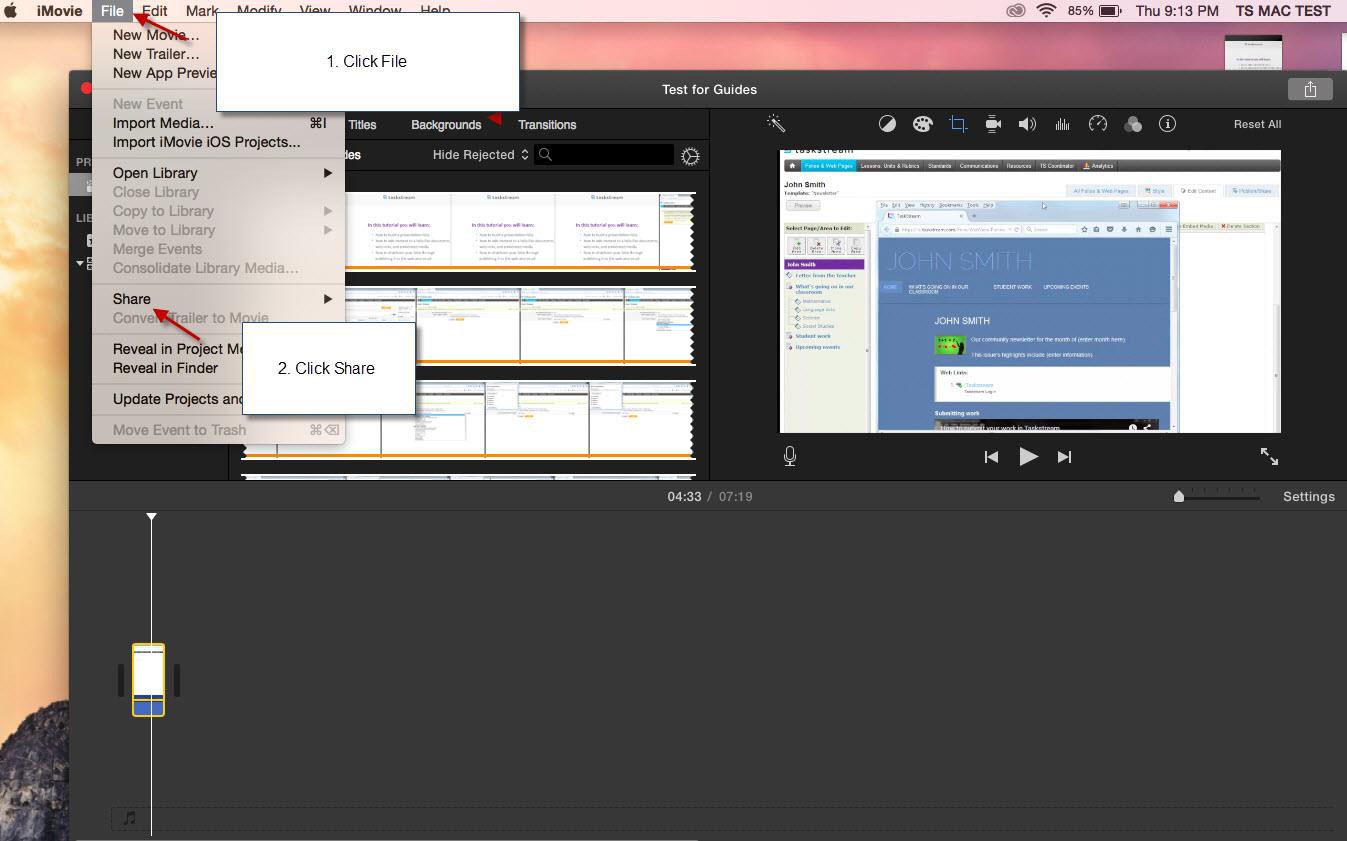
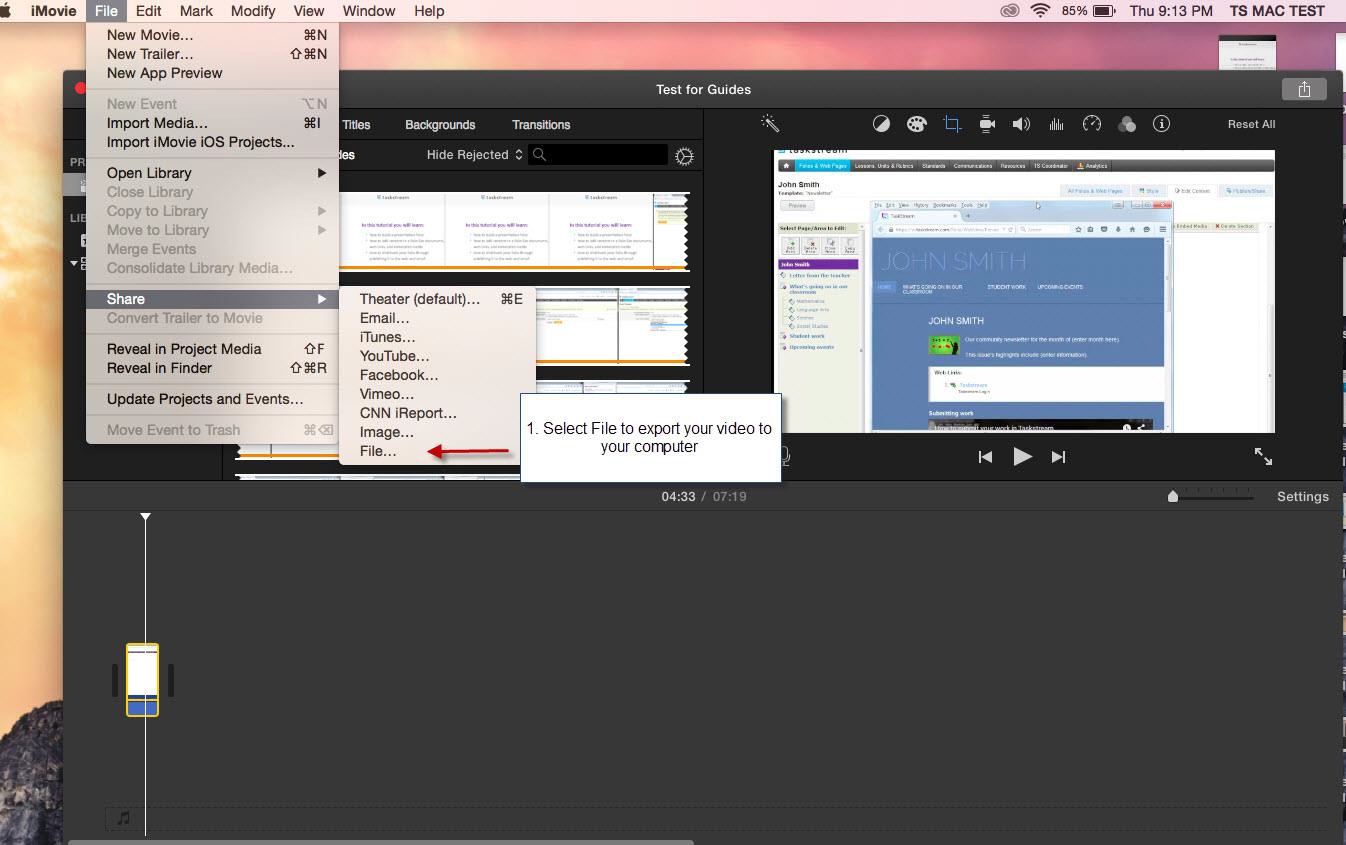
9. Click File and then select Share.
10. Select File.
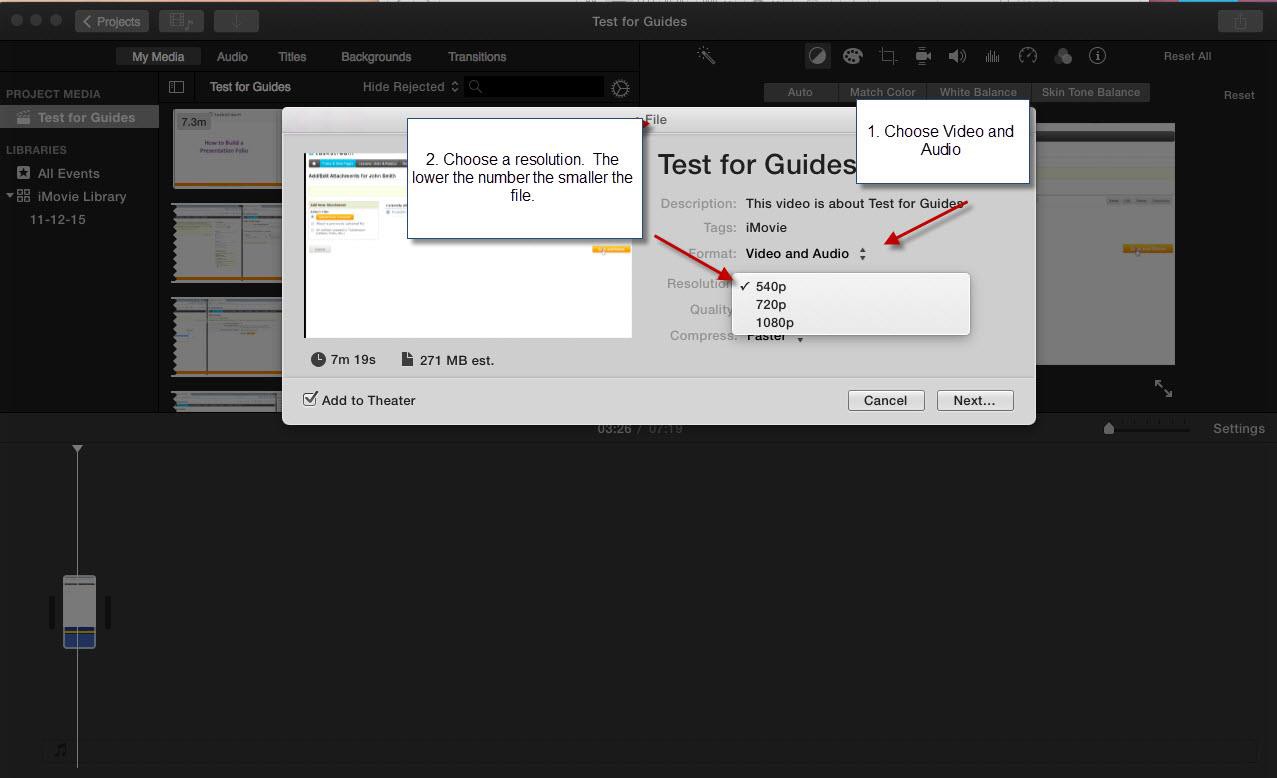
11. Choose Video and Audio and select a resolution of 720p. The lower the resolution number, the smaller the resulting file will be.
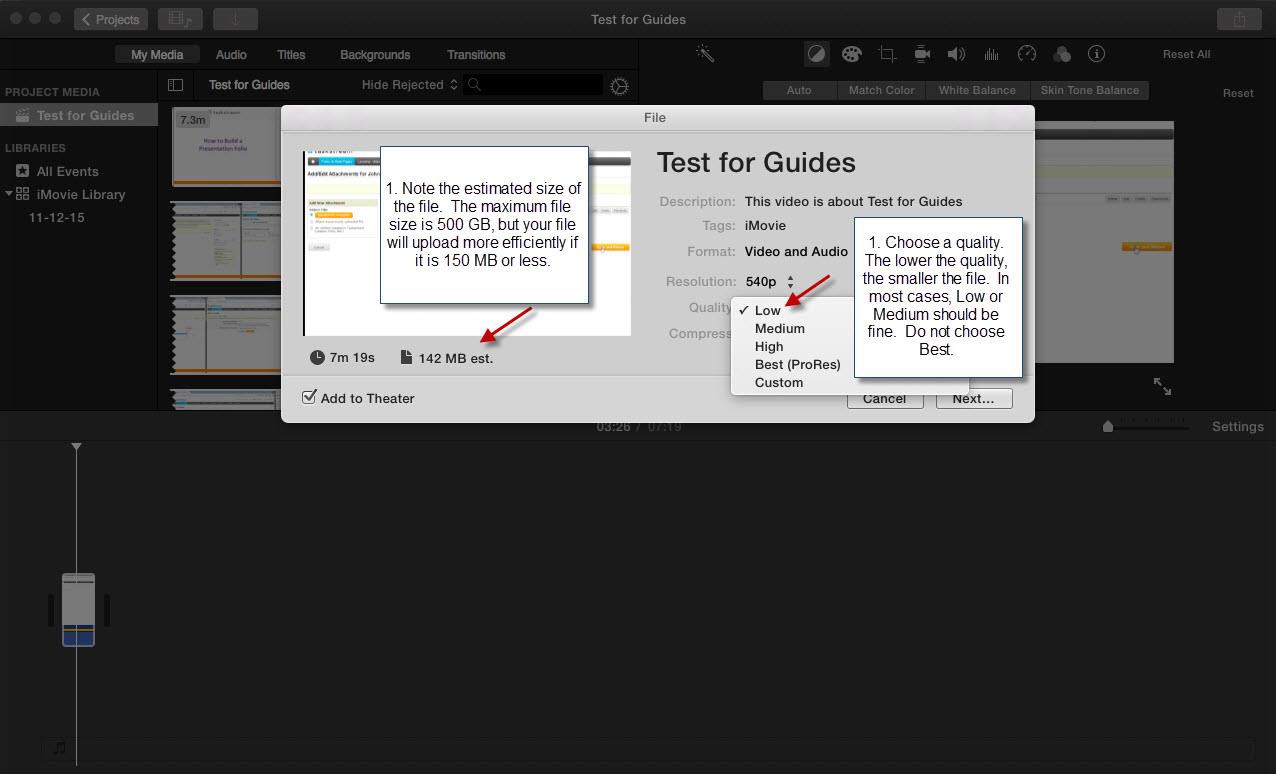
12. Choose a quality setting of Low. The lower the quality, the smaller the resulting file will be.
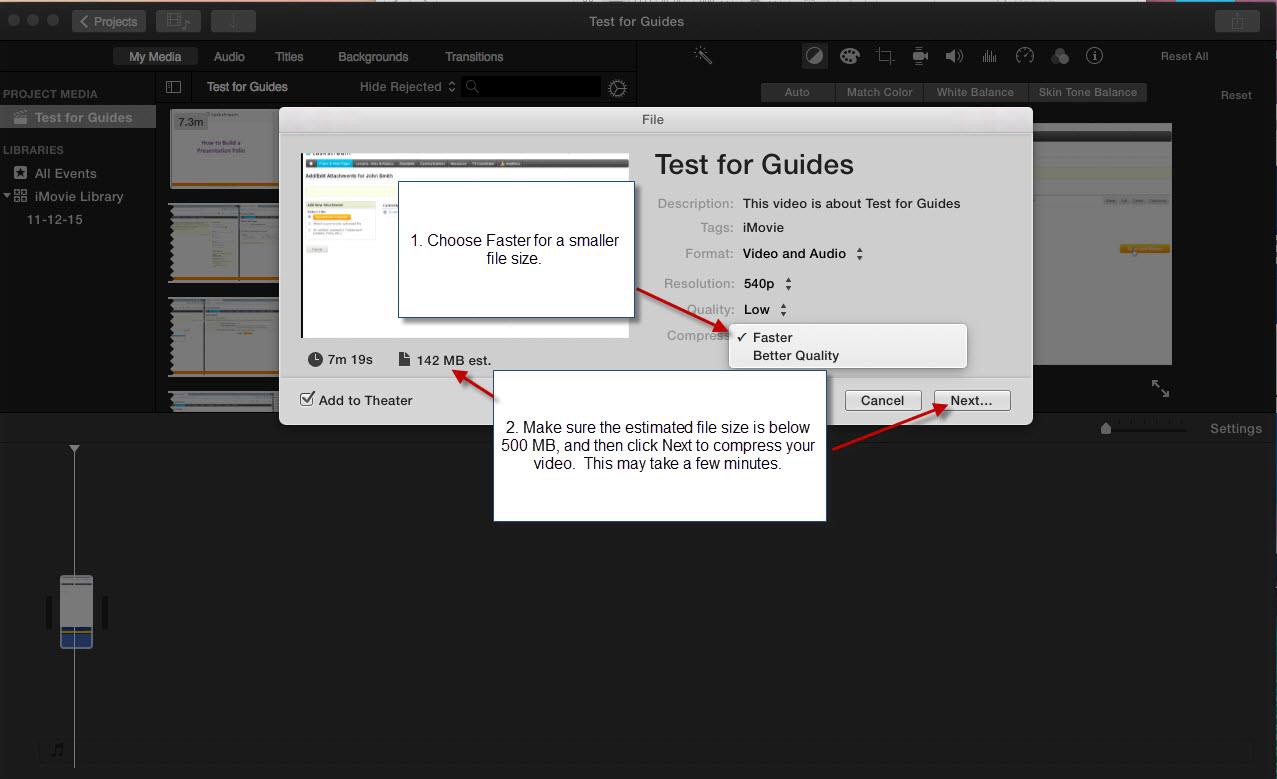
13. Choose a compression method of Faster. Faster will result in a smaller file size.
14. On the lower left portion of the panel, you will see the estimated files size, as well as the total time. Be sure the file size is 500 MB or less. If it is not, go back to 11-‐13 and adjust for lower file size. Click NEXT.
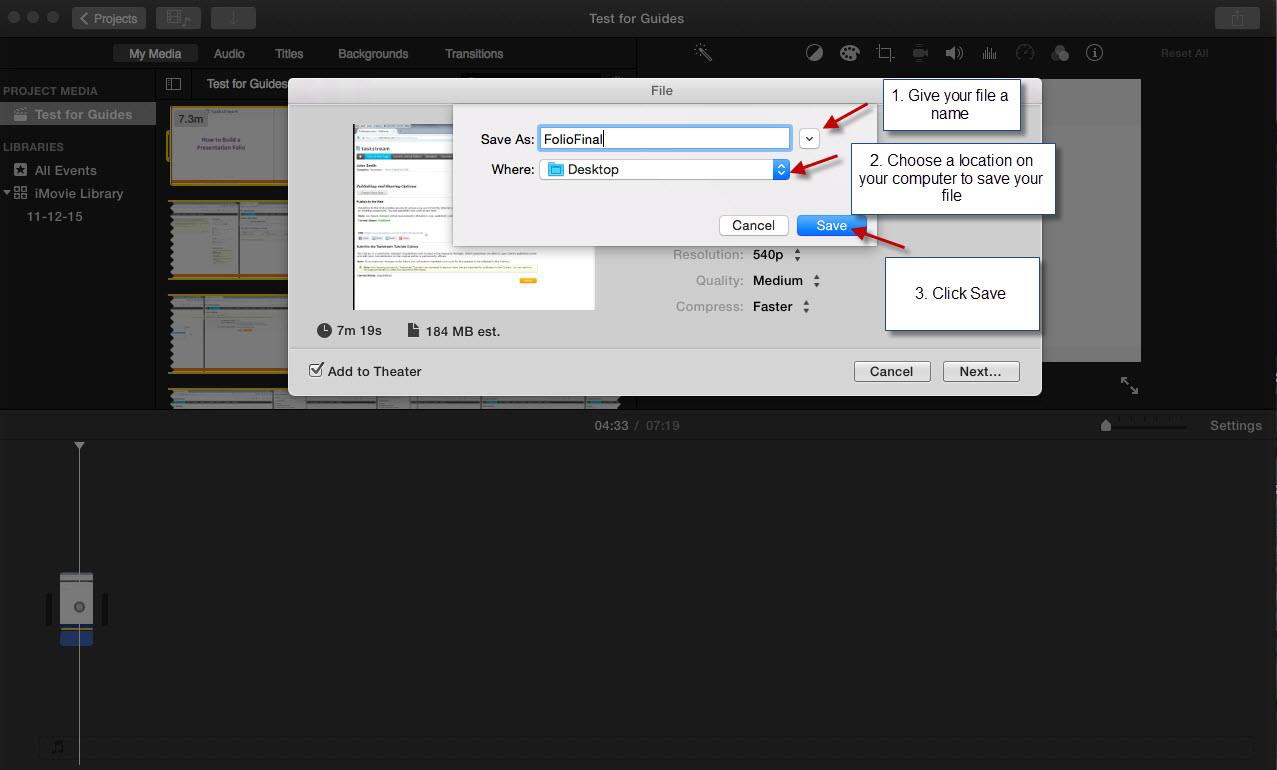
15. Save As: enter a filename. The filename must contain your name (i.e., “John Smith EdTPA video”).
16. Where: select the “Documents” folder.
17. Click Save.
18. On the upper right hand corner of the screen will be a moving pie-‐chart circle, which indicates the compression process. It may rotate several times before it is finished. A 15-‐minute video may take 1-‐3 minutes to complete. A one-‐hour video may take 5-‐15 minutes to complete.
19. Once completed, be sure to check the resulting file by finding the file on the computer in Finder (happy face icon on the desktop). Click on Finder and select Documents on the left panel. From there, you should be able to find your file. Double-‐click on the filename to open it in QuickTime.
20. When you open the file in QuickTime, it will show the video length. For EdTPA, the length should be 15 minutes or less. Once you are happy with your video, you may upload it into Taskstream. You can also copy your file into a jump drive, or upload your file into a cloud storage service such as Google Drive.
The Cahill Lab is not responsible for your original media content. You should always have an original copy of your project in the original medium in your possession. Files stored in Cahill Lab computers are deleted at the end of each semester. Many students access the computers and accidental erasure may occur. Always have a copy of your work with you at all times. It is recommended that you purchase a 32GB or higher USB jump drive to save your work.