Editing Video Files with iMovie
For information about importing movies into iMovie, please visit Importing and Compressing (Saving) Video Files.
Part A: Extracting a Video Segment from your video file
Once you have imported your video into iMovie, you can edit the video and extract a desired segment and length. You can even import multiple videos and create a final project with multiple segments. In general, EdTPA allows a final video length of 15 minutes or less with no more than two segments from the same lesson. The final video also cannot be more than 500 MB in size. With that in mind, you should choose your segments carefully. When reviewing your video, note the desired Begin and End times of your desired segments. You can split, delete or append multiple segments.
Expanding and contracting the timeline [Figures 1 & 2]
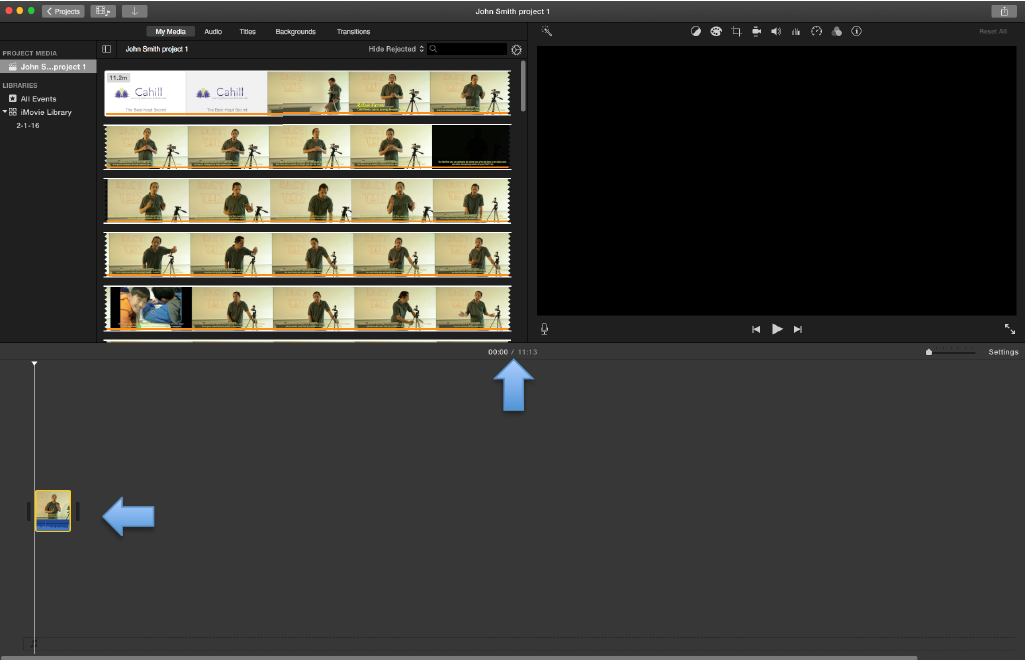
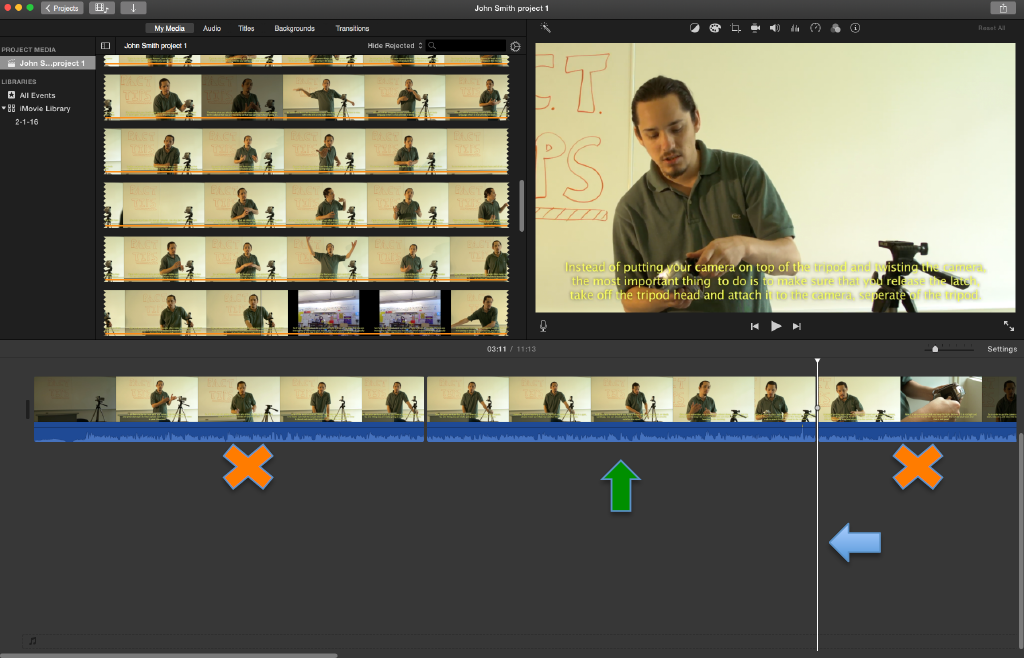
- Once you have imported your video and dragged it into the timeline (bottom portion of the screen), you will note that a thumbnail of that video will appear on the timeline. That thumbnail can be expanded in order for you to edit the video more easily. Also note that the length (time) of your video is shown at the top of the timeline.
- On the upper right hand corner of the timeline, there is a Settings slider. Slide the button one notch to the right. This will expand the timeline. Moving the slider one notch at a time to the right will expand the timeline. Moving the slider one notch at a time to the left will contract the timeline.
- On the bottom of the timeline, there is a position slider, slide it all the way to the left. You should now be able to see the timeline from the beginning. Move the bottom slider back and forth to view different time frames in the timeline.
Playing the video [Figure 3]
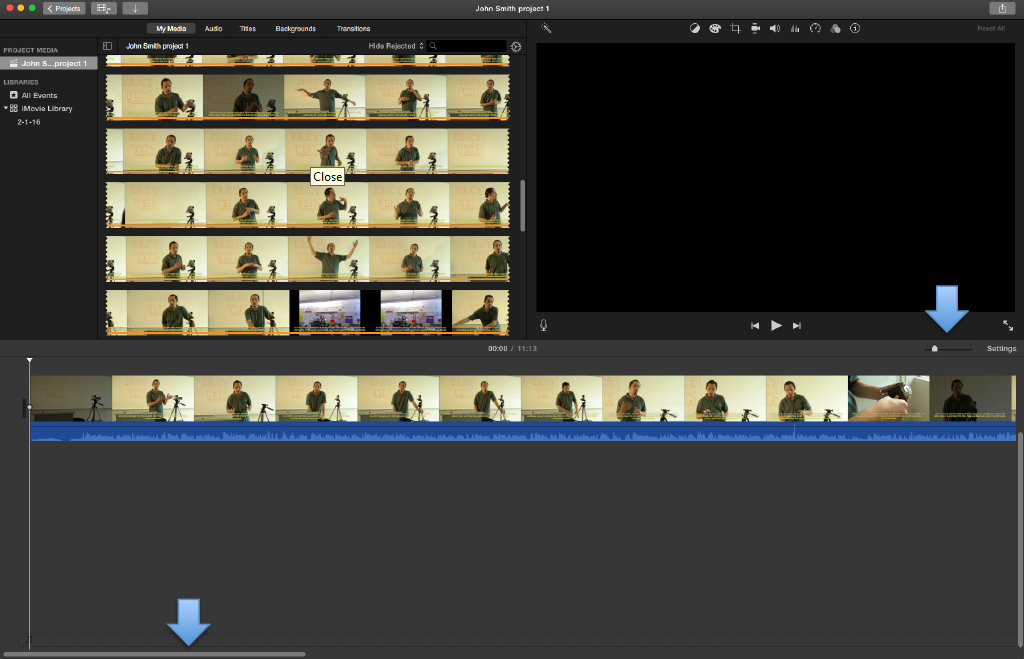
- You can play your video at any time by clicking on the Play button beneath the Video Pane (upper right hand portion of screen). You can Stop, by clicking it again. Play begins where the marker is located.
Splitting at the Begin and End points of your video. [Figures 4 & 5]
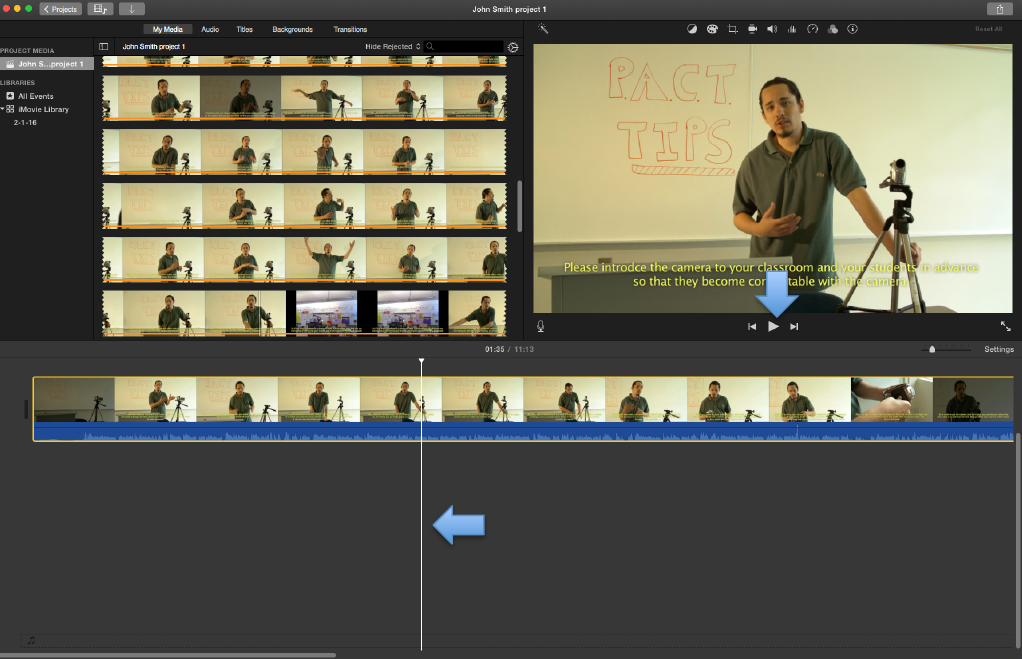
- Move your cursor to the desired Begin point on the timeline. The cursor moves along with the marker (vertical white line). The video pane will show exactly the frame the marker is on within the timeline.
- Click your mouse and the marker will stay in place. This is your Begin point.
- On the main iMove menu, go to Modify and select Split Clip. The video has now been split at the vertical white line into two clips. The Begin point is where the video splits.
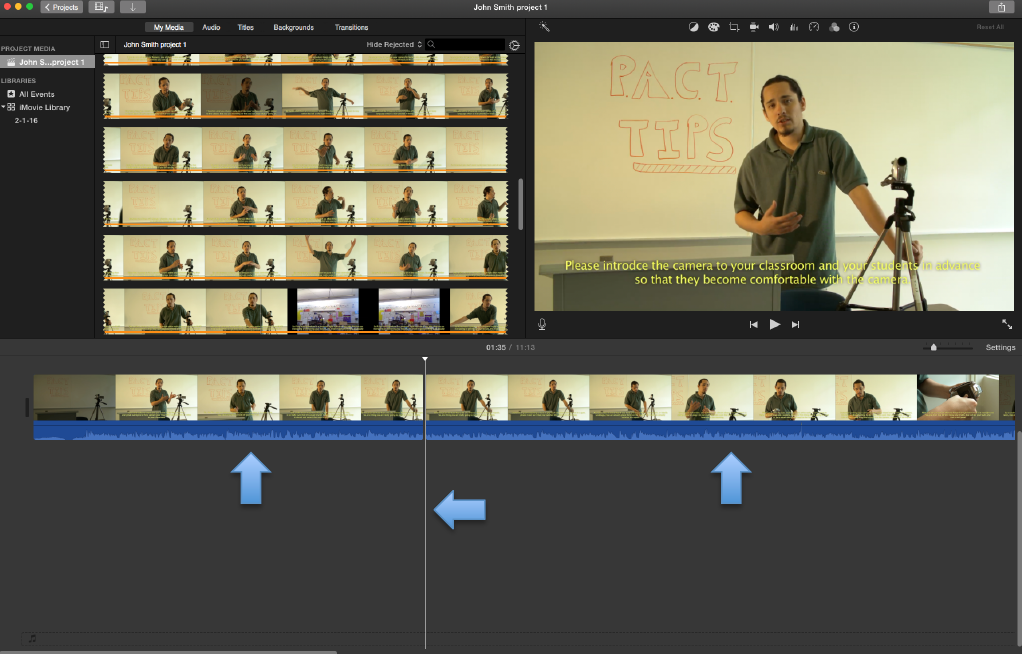
- You must now split your video a second time at the End point to get your desired segment.
- Move your cursor to the desired End Point and click the mouse.
- Go to Modify and select Split Clip. There are now three clips.
- The middle clip (green) is your desired Video Segment. You must remove the undesired clips.
- To remove the undesired clips, simply double-‐click on the clip and press the “Delete” button on your keyboard. You can undo this by pressing Command⌘ Z, or by selecting Edit and Undo from the main iMovie menu.
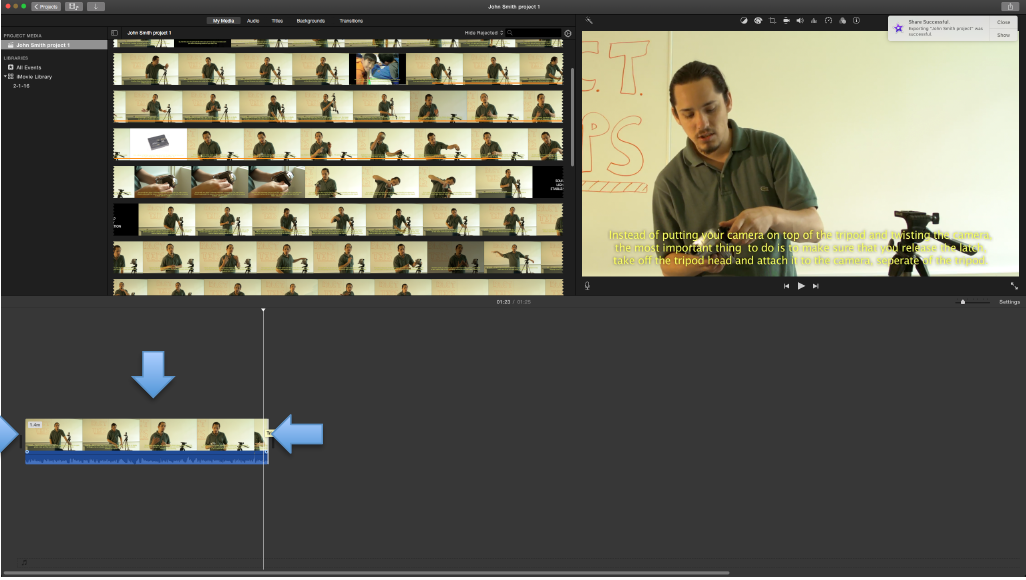
You now have your desired Video Segment [Figure 6]
- In reality, this video segment still contains the entire video. You can actually continue editing this segment by placing your cursor at the Begin point or End point of the segment, and clicking and holding the left button of the mouse, then moving the endpoint to a new desired position. Be careful to note changes in video length (time) when moving endpoints.
Part B: Inserting and editing Multiple Segments
Inserting a Second Segment [Figure 7]
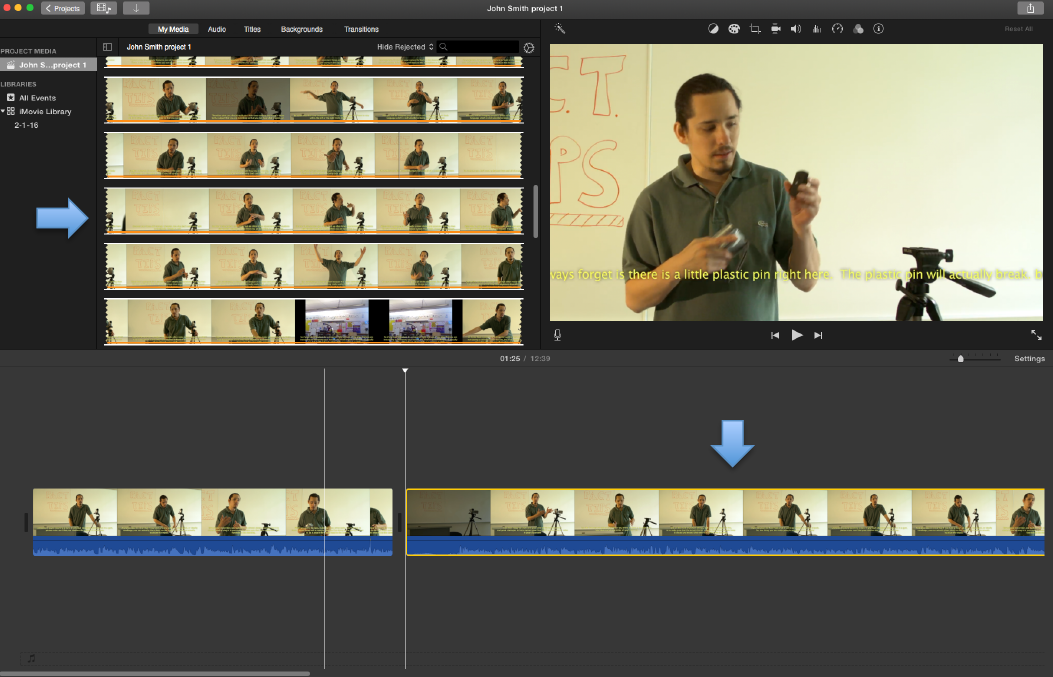
- In some cases, you may want to include more than one segment in your final video.
- On the upper left hand portion of the screen is the Import Pane, use your mouse to highlight the portion of the filmstrip you desire by clicking, holding and moving your mouse. If it is already highlighted, click on any portion of the screen outside of the Import Pane and un-‐highlight. Highlighted segments are in yellow.
- If you want to select the entire filmstrip, go to Edit and Select All from the iMovie main menu or use Command⌘ A.
- Next, drag the highlighted filmstrip to the timeline. You will see the highlighted Second Segment.
- This second segment is the entire original video and can be edited just like the first segment by following instructions 3a thru 4.
- You can continue to do this for multiple segments.
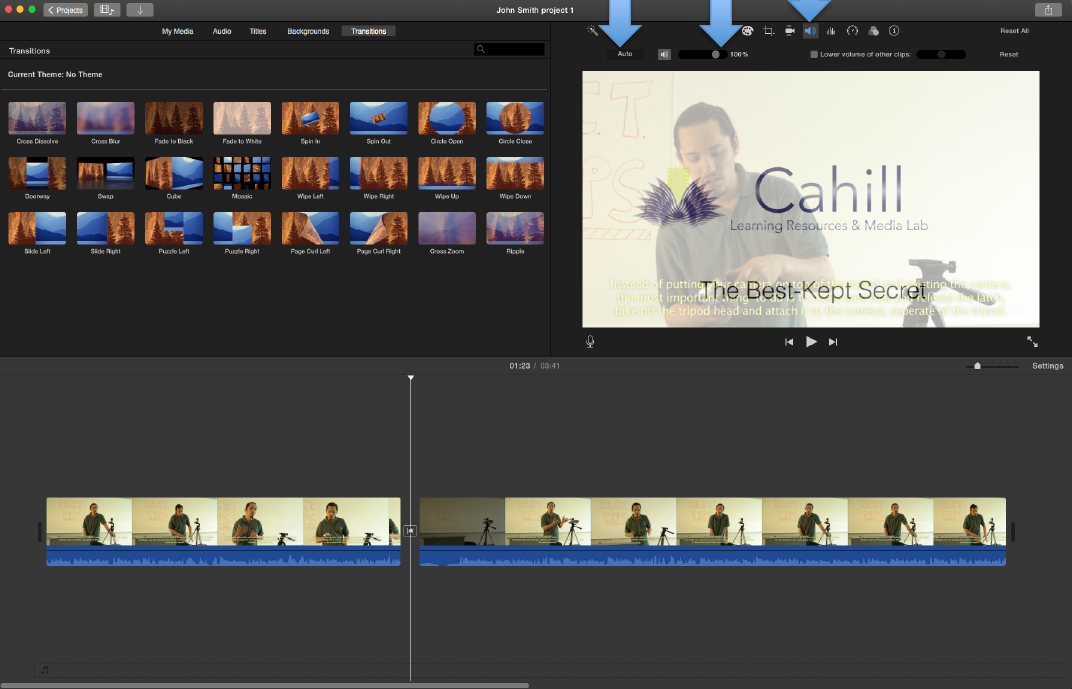
Part C: Finalizing your video (Inserting transitions and Optimizing sound)
Inserting a transition [Figure 8]
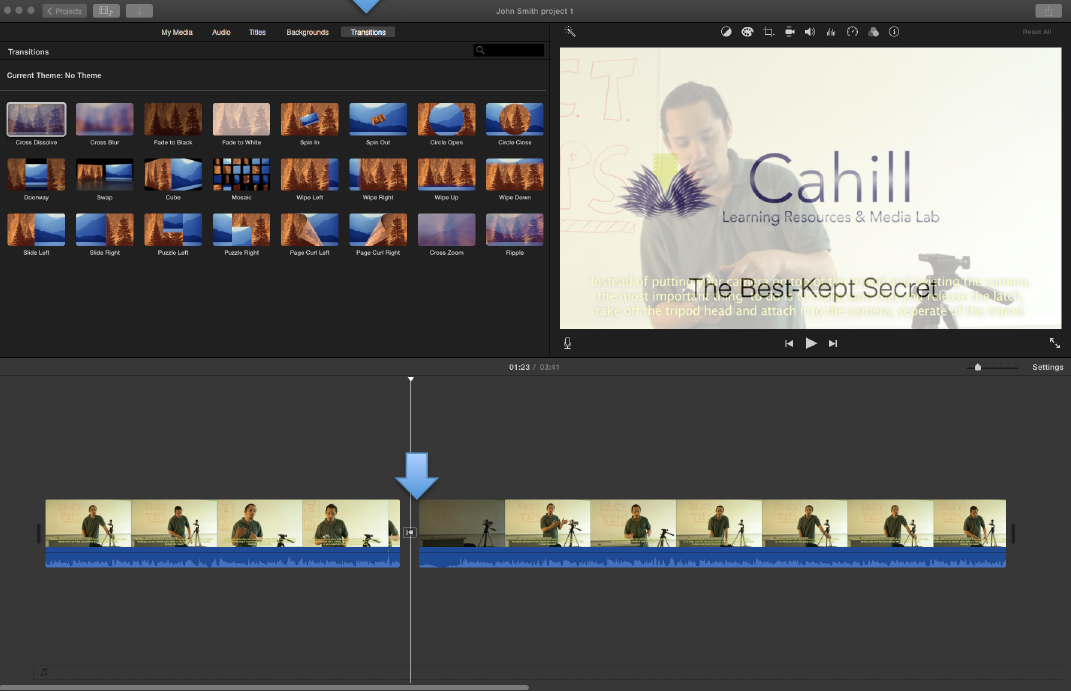
- To insert a transition like a cross-‐dissolve, click on “Transitions” on the top of the upper left hand pane. You will see a variety of transition icons.
- Drag and drop the “Cross Dissolve” icon to the space in-‐between the first and second segment of the timeline.
- You will see a butterfly symbol between the segments.
- When you play the video, you should notice a transitional dissolve between the two scenes.
Optimizing Sound [Figure 9]
- Occasionally, recorded sound might be distorted or muffled. You can optimize the sound by clicking on the Speaker icon on top of the upper right hand Video Pane. A sound menu bar will show up just below the speaker icon.
- To automatically adjust the sound, highlight the entire timeline and click on “Auto” on the sound menu bar.
- To make the sound louder or softer, use the Percentage slider on the menu bar.
Ready to export (Compress) Video
- Once you are done editing, you are ready to export.
- Everything on the timeline will be exported.
- The material on the upper left hand Import Panel will NOT be exported.
- The exporting process is a dual process.
- Your video segments will be concatenated (attached together) and compressed into a single video file.
- Your video will be converted into a .MP4 file, which can be saved into a USB jump drive or uploaded into a cloud storage drive.
The Cahill Lab is not responsible for your original media content. You should always have an original copy of your project in the original medium in your possession. Files stored in Cahill Lab computers are deleted at the end of each semester. Many students use the computers and accidental erasure may occur. Always have a copy of your work with you at all times. It is recommend that you purchase a 32GB or higher USB jump drive to save your work.